|
|
Home Application Features | Pictures Login Buy Now |
How to setup Wi-Fi camera in BotEyes robot
Robot camera setup
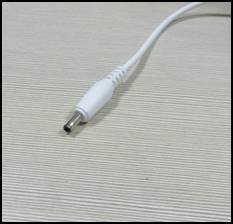
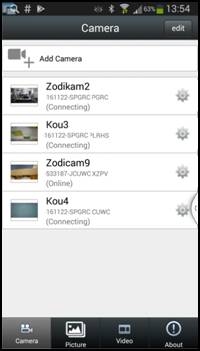
How to connect your camera for AndroidRobot connection to Wi-Fi network includes two stages: a) camera connection; b) wheels part connection. This user manual relates to wheels part. It can be done with Windows10-based PC computer only. After robot has been connected to the Internet it can be controlled from PC computers, iOS9-based iPADs and Android-based smart phones. Original manual you can find here: http://camhi.top BotEyes-Mini can use any Wi-Fi camera if its mounting holes allow doing this and if it can be connected to 5V 1A power supply using 3.5 mm connector (fig. 1). Below you can find instruction for robot default camera setup. 1. Be sure your smart phone has been connected to your home WiFi net. 2. Download and install CamHi 3. Open CamHi application and press the "Add Camera" button in "Camera" window (fig. 2). In our case you can see four cameras connected to net before. In your case there are may be no cameras at all.
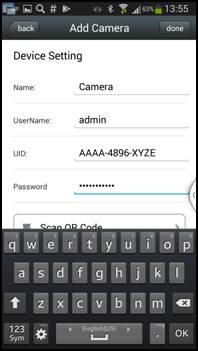
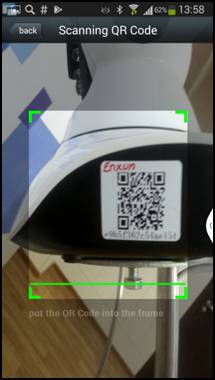
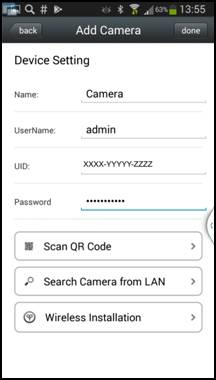
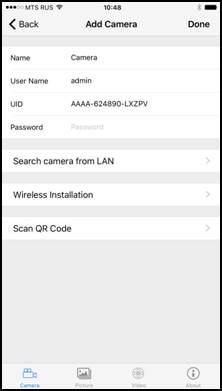
4. In the next window you need to input Camera Name, User Name ("admin"), camera identification number (UID) and default password ("admin"). In the future it is strongly recommended to change UserName and Password to prevent another people from possibility to see your camera without your permission. To change the password you need to press star icon in fig. 2 and choose "Edit Password" in opened window and change password for new one. 5. Input camera identification number in field "UID". You can find UID in camera case. This number you can enter manually or using your gadget scanner. In last case you can scan QR code from camera case. To do this press "Scan QR Code" (see. fig. 3) and direct gadget's camera to QR code (fig. 4). "Scan QR Code" button can be not visible if screen keyboard obscures it. Remove the screen keyboard to see the button (fig. 5).
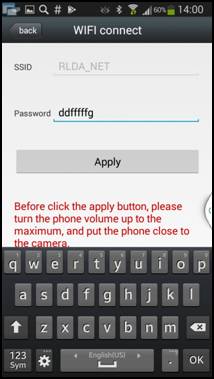
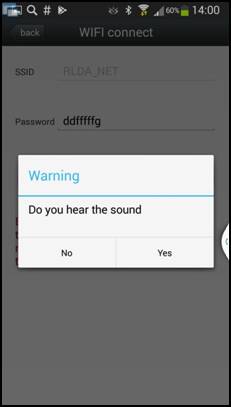
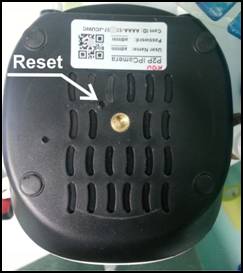
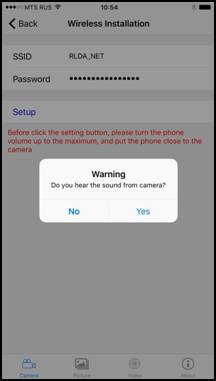
6. Press the "Wireless Installation" button (fig. 5). In the appeared window (fig. 6), you need to enter the WiFi net password. 7. Turn the robot button power on. After 30...60 second camera begins calibration process. It will turn top-down, left-right and then freeze, after that you can hear pperiodic sounds of a bell. 8. If you hear bell sound press the "Apply" button (fig. 6). Make the maximum speaker volume and place it in distance 20...50 cm from camera. 9. If you see the window "Do you hear the sound?" (fig. 7) (It means periodic bell sound) and hear this sound, press the "Yes" button. If you don't hear periodic sound, press the "Reset" button in bottom of your camera (fig. 9). Reset button placed deep in bottom of the camera. To press it you can use non-metal toll like toothpick. You need keep the button pressed about 5...10 sec until you hear a solemn melody. This melody means that camera start the reboot process and calibration. About 1-2 min later the camera starts to sound periodically.
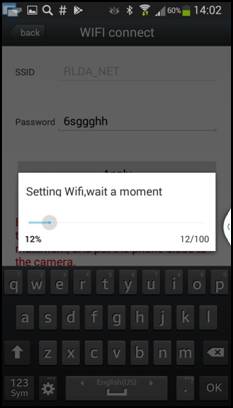
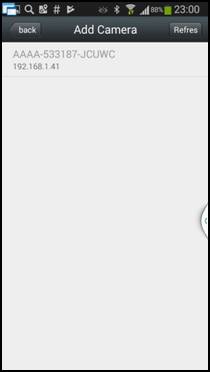
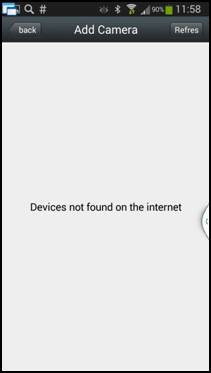
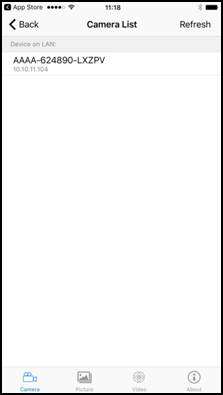
10. Now, when you hear the periodic sound (fig. 7), you can press the button "Yes". The camera starts to look for the net connection (fig. 8). If the connection is established you will hear the solemn sound. Wait for the end of search (fig. 8) and in the next window (fig. 10) press the string with camera ID, after that you will see the next window fig. 5, where you need to press the "back" button in left top, after this will appears the window fig. 2. 11. If you see the message "Device not found" (fig. 11), do not pay attention to it and press the "back" button in left top of window and after you will see page fig. 5, press the button "done". Camera will appear in the next window (fig. 2). If you don't see camera again, do everything again, as described above.
12. To see video you need press the camera name in window in fig. 2.

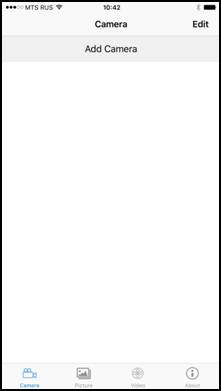
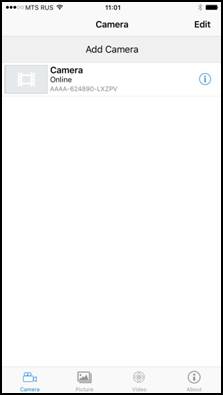
How to connect your camera for iOSBotEyes-Mini can use any Wi-Fi camera if its mounting holes allow doing this and if it can be connected to 5V 1A power supply using 3.5 mm connector (fig. 1). Below you see instruction for robot default camera setup. 1. Be sure your smartphone has been connected to your home WiFi net. 2. Download and install CamHi 3. Open CamHi application and press the button "Add Camera" in window named "Camera" (fig. 12). In the appeared window (fig. 13) input the camera name (in our case it is "Camera"), User Name (admin) and Password (admin). User name and password cannot be another in this stage, but you need to replace it for your own in future steps.
4. To input UID, press "Scan QR Code" (fig. 13) and forward your iPAD camera to QR code in tha Wi-Fi camera case (fig. 14). Read code will appear automatically in string "UID" in fig. 13. You can input UID manually, it is written on the camera case.
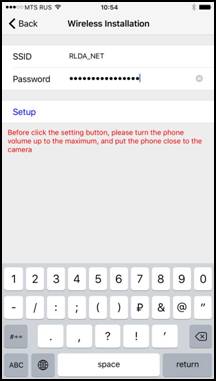
5. Press the "Wireless Installation" button. It is appeared the window like in fig. 15. Input your WiFi net password here and press "Setup". There will be opened window fig. 16. Don't press the button "Yes", or "No". 6. Turn the camera power on. After 30...60 second camera begins calibration process. It will turn top-down, left-right and then freeze, after that you can hear pperiodic sounds of a bell. After you will hear these sounds, press "Yes" in (fig. 16). Make the maximum speaker volume and place it in distance 20...50 cm from camera. 7. If you don't hear periodic sound, press the "Reset" button in bottom of your camera (fig. 14). Reset button placed deep in bottom of the camera. To press it you can use non-metal toll like toothpick. You need keep the button pressed about 5...10 sec until you hear a solemn melody. This melody means that camera start the reboot process and calibration. About 1-2 min later the camera starts to sound periodically and you can press "Yes".
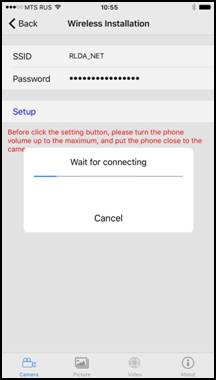
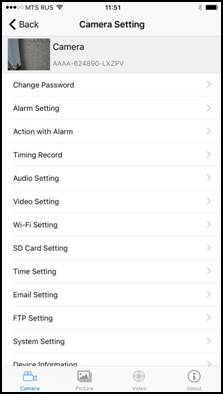
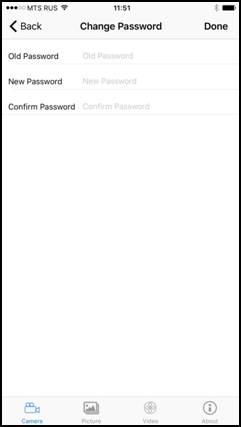
8. The camera starts to look for the net connection (fig. 17). If the connection is established you will hear the solemn sound. Wait for the end of search process and you will see the window like in fig. 18. Here you need to press the string containing camera ID, after that you will see window like in fig. 13, where you need to press the "back" button in left top and there will be appeared window like in fig. 19. To view the camera video it is enough to press the string with camera name. 9. If you see the message "Device not found", do not pay attention to it and press the "back" button in left top of window and after you will see the next page, press the button "done". Camera will appear in the next page (fig. 19). If you don't see camera again, do everything again, as described above. 10. To change the password you need to press the icon "i" in fig. 19 and in the next window (fig. 20) press "Change Password". In the next window (fig. 21) input old password (Old Password) - admin, then "New Password" and confirm it in field "Confirm Password". Press the button "Done". It guarantees that no one can have access to your camera.
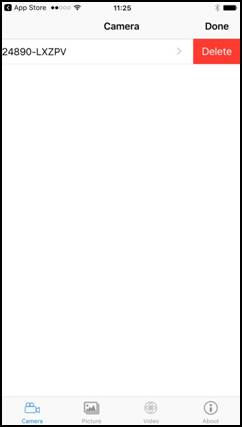
11. If you want to delete camera, move to left the string with camera name (fig. 19) and press "Delete" (fig. 22).

How to connect your camera for Windows caseBotEyes-Mini can use any Wi-Fi camera if its mounting holes allow doing this and if it can be connected to 5V 1A power supply using 3.5 mm connector (fig. 1). Below you see the instruction for robot default camera setup. 1. If you use desktop PC, the camera video can be viewed with HiP2P free application that can be downloaded from /HiP2P_Client.zip or last version from here: http://camhi.top/ . Unpack downloaded file and install it. You will see HiP2P application in your desktop (fig. 23).
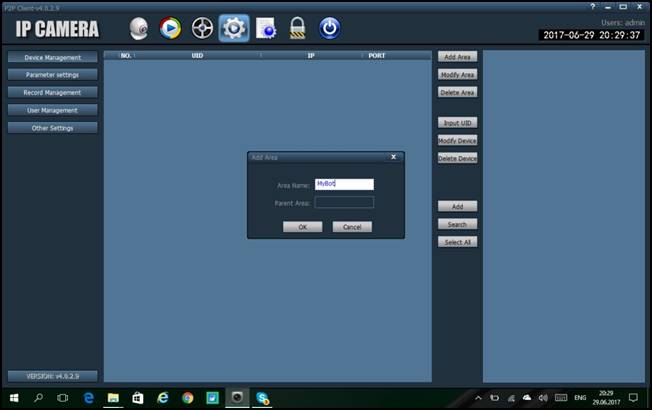
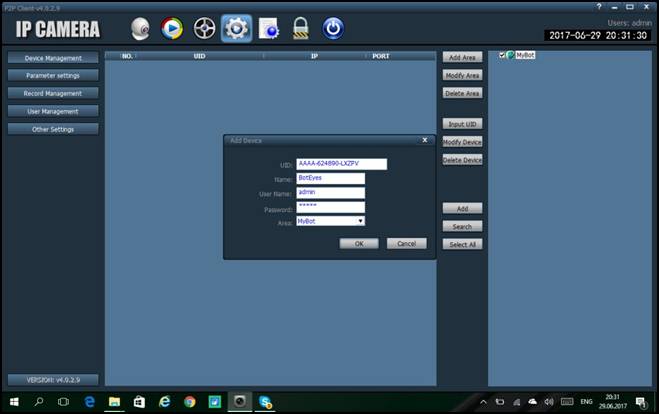
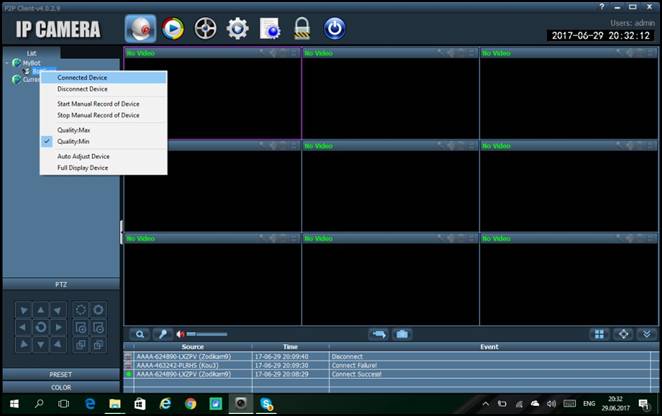
2. Press the gear icon in top of HiP2P main window (fig. 23) and "Add Area" in appeared window (fig. 24), input arbitrary group name (in our case it is "MyBot"), and press "OK". Then press "Input UID" button and input camera UID from camera case in window fig. 25, then input arbitrary name (in our case it is BotEyes) and password "admin", then press "ОК".
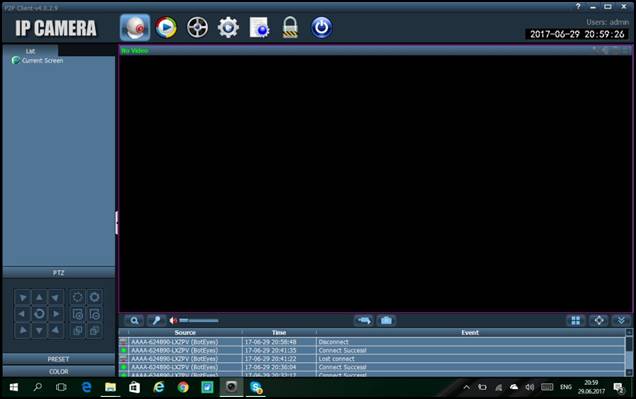
3. Next, click the icon with camera picture in left top of application main window. In left of window it is appeared your camera name (fig. 26). Press it by right mouse button and choose "Connected Device" in the list fig. 26. After that in bottom of main window (fig. 26) you can see string "Connect Success", with green point in left. This means that camera has been connected successfully. The connection process can be too slow, up to 1 minute. 4. To view camera video, make mouse double click on camera name ("BotEyes" in our case in fig. 26). The camera window can be done bigger by mouse double click in this window (fig. 27). 5. In right-bottom of fig. 27 you can see the robot control disk; it is appeared after entering in website for robot control. 6. If camera too slowly reacts on moving commands, you need to reconnect it and connect again, using "Disconect Device" and "Connect device", as it was described above.
|
||||||||||||||||||||||||||||||||||||||||||||||||||||||||||||||||||||||||||||||||||||||||||||||||||||||||||||||||||||||||||||||||||||||